Ambient lighting affects your vision to a significant extent. As program participant you already know this – even for you though, things to consider (at the end of the post).
If you wear full strength prescription lenses, as prescribed by your local optic shop, you might not notice to what extent your vision is affected by ambient lighting. Your natural eyesight is much like a camera, in that lower light results in a less detailed image – and less detail, if your vision is already less than perfect, translates to a (perceived) blurry image.
This is one of the reasons that the ‘quick fix’ style of the single prescription paradigm as practiced by most optic shops, puts you in a dark room, when they measure your eyesight.
The problem of course, with a prescription created in that dark environment (with a spot light eye chart), is that during the day time, you are effectively overprescribed. This overprescription will add to the problem of an excessively changed focal plane, to contribute to your myopia continually getting worse.
Just as with any other prescription drugs, you want to use the minimum necessary dose, to deal with a symptom. You wouldn’t take morphine for a headache, right?
Because of the fact that our environment affects our vision, we do not subscribe to the single prescription paradigm here. We use prescription lenses specific to the necessary distance for the task, and relative to the ambient lighting (and corresponding distance needs).
I mention in the program, that you may want to use your previous normalized prescription (reduced strength distance prescription) for driving at night, or if you are still relatively new to the program, to use your old full prescription, while requiring perfect distance vision, at night.
If you are not currently participating in the Vision Improvement Courses but want to see the effects of different lighting on your own eyes, you can do so very easily, yourself:
Download (or buy on Amazon) a Snellen Eye Chart
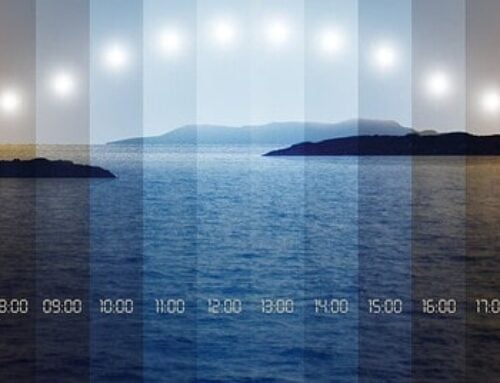
Check your eyesight using the chart. Try it first outdoors, on a nice, sunny day (in some light shade, so you don’t squint). Record the results.
Then, move the chart indoors. Try the same thing, again.
Try the chart, in a room with fluorescent lighting. Compare the results to the outdoor results. You may find a notable difference in your eyesight, especially if you take some time to focus on each letter, and really try to get some focus (vs. just a quick look at the chart).
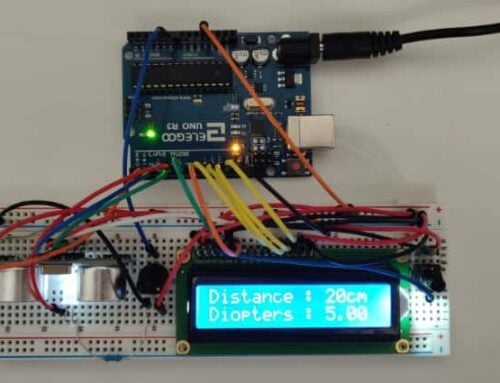
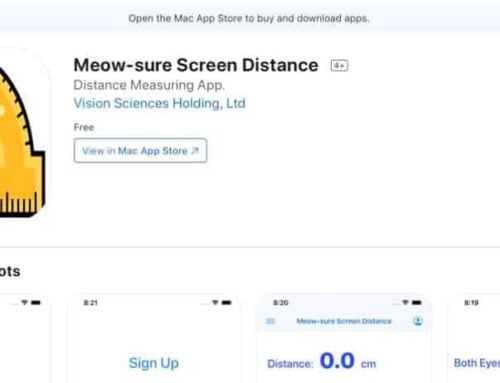
Use the Centimeter Measurement Tool
Similar in concept to an eye chart, except that you can use this variation at closer range, and get more data, than from the Snellen chart. The instructions can be found here.
Again, try in bright daylight, compare to indoors, compare to fluorescent ambient lighting. Record your results, expand your experiment by trying again the next day.
The variation can be notable, especially if you are already used to working on your eyesight. In the program we discuss additional strategies to manage ambient lighting – in any case, you want to do as much of your close-up work with good natural lighting, at a healthy distance from the screen.
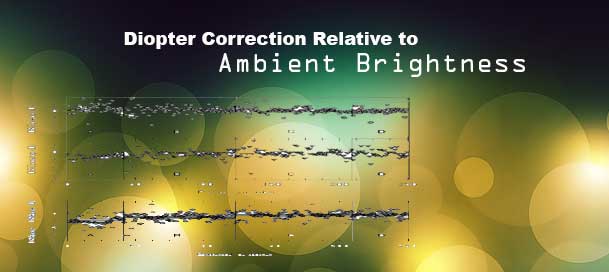
An interesting observation, for program participants: You can use the centimeter to make a dioptric comparison of various ambient lighting scenarios. Take the bright, outdoor measurement, compared to indoors, and various different types of lighting sources, and look at how many diopters of correction you need, relative to the light source and brightness.
This can be helpful to a) measure your relative progress in various lighting conditions and b determine the correction needed for tasks such as night driving.
Enjoy!
![]()