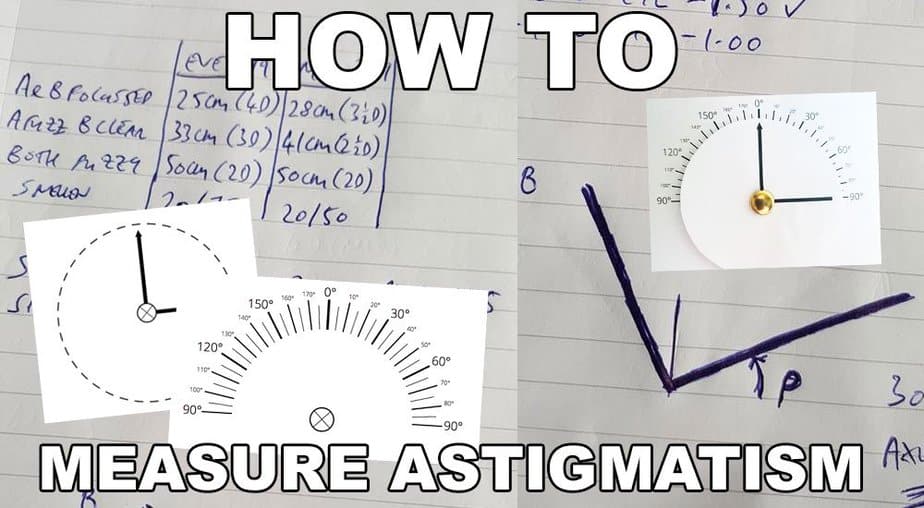
Want to learn how to measure astigmatism diopters? Then you’re in the right place. Pull up your comfy chair, this one is going to take a minute to learn all about! (and it’s rather ingenious, too)
Prerequisite: Understand centimeter measurement.
Measuring your astigmatism does require a bit of preparation. There are two (fundamentally very similar) ways to do it (without a test lens kit), both requiring a measuring tape, a piece of paper, and a tiny bit of math.
First let’s look at the printable solution, the slightly more accurate (and cool) way. You’ll need a printer for this one!
The Astigmatism Measuring Tool
Note the PDF version of this is here, which includes the printable tool and all instructions.
HOME ASTIGMATISM MEASURING KIT
I BUILD YOUR MEASURING TOOL
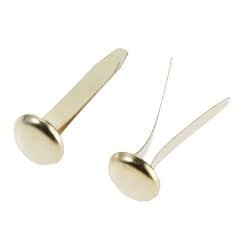
- Acquire paper fastener*.
- Get a flexible measuring tape.
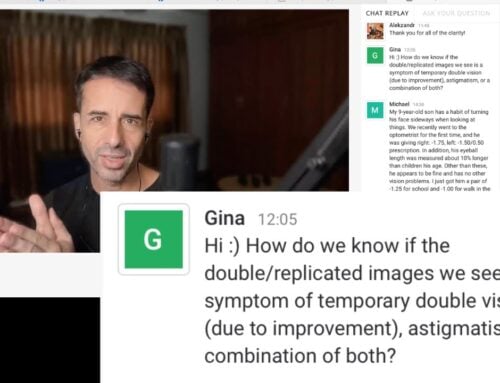
- Print the image below.
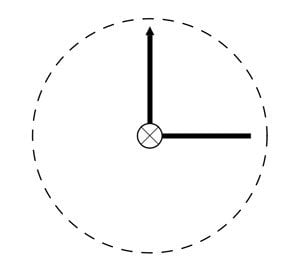
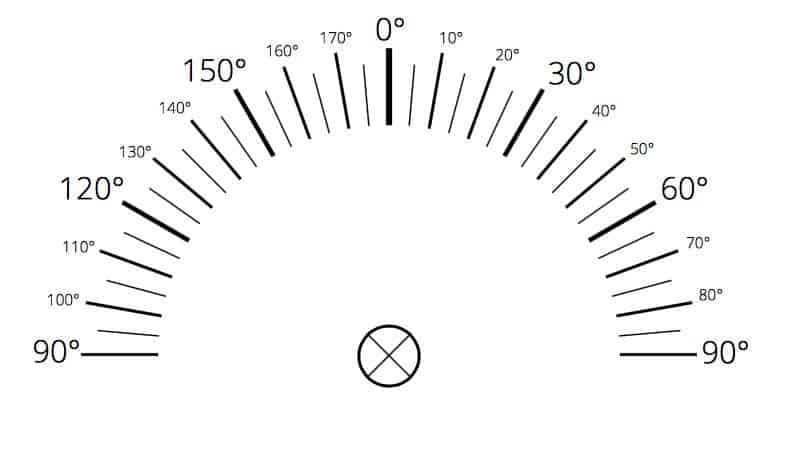
- Cut at dotted line. (You now have two pieces – a round indicator dial with two line markers and a degree dial.)
- Attach the dial piece to the degree dial using a paper fastener.
Paper fastener:
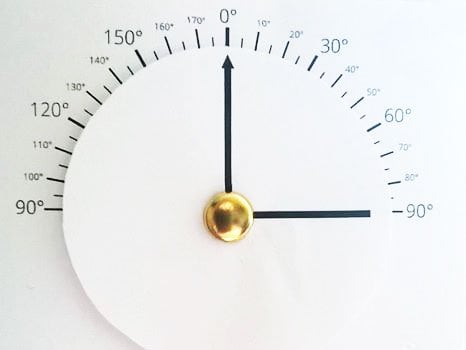
Indicator Dial:
Degree Dial:
MEASURE AXIS NUMBER
Hold the device with its base horizontal and the arrowhead pointing to the 12.00 o’clock position. Ensure the dial is well illuminated.
- Remove glasses.
- Cover left eye.
- Slowly move back from the dial until faint ghosting (an offset dual image or silhouette) begins to appear adjacent to and along one side of the arrowhead line.
- As you turn the dial in the direction of the eye being tested, a point will be reached where the faint ghosting will shift to the other side of the arrowhead line. Rotate the dial left and right until the ghosting becomes equal on either side of the line.
If the ghosting merges with the line, move a little further back to make the ghosting ever so slightly stronger until it no longer merges with the line. Then rotate the dial until the ghosting becomes equal on either side of the line.
- Write down whatever value in degrees that the arrow is pointing to. This is your axis number. (The dual image will be offset along this axis.)
- Repeat with right eye.
MEASURE CYLINDER NUMBER
Hold the device with its base horizontal and the arrowhead line pointing to the axis value that is relevant to the eye being tested. Ensure the dial is well illuminated.
- Cover the left eye.
- Slowly move back from the dial until you find the point where (as far as possible), both lines appear equally clear, and on the verge of producing equally faint ghosting.
- Measure & record the distance from the face of the dial to your eye. This is Measurement A.
- Move further away from the device until the arrowhead line is on the verge of blurring.
- Measure and record the distance from the face of the dial to your eye. This is Measurement B.
- Repeat with right eye.
Then calculate your cylinder value as follows:
CYL = (100 / MEASUREMENT B) minus (100 / MEASUREMENT A)
NOTES
Record all values in your log.
Repeat measurement at least twice daily for at least three days. Evaluate real astigmatism values based on result averages.
In many cases astigmatism below 1 diopter is not necessary for differential (close-up) correction lenses. Assess your own needs by checking your close-up vision without glasses and degree of astigmatic blur your experience.
Review the posts in the astigmatism section of endmyopia.org: https://endmyopia.org/correct-astigmatism/
When reducing astigmatism correction, substitute 1/2 diopter of spherical correction for 1 diopter or astigmatism correction for relative equivalent focal plane correction.
*Consult your natural myopia control friendly optometrist or ophthalmologist for additional guidance and where required by law. Do not use less than required correction for driving or activities requiring ideal acuity in potential adverse conditions (poor lighting, moving at speed, etc).
PRINT ASTIGMATISM MEASURING TOOL
Click the link below to download the PDF vector graphic of the tool.
or you can try this one: astigmatism-measuring2
Large version: astigmatism-measuring-big
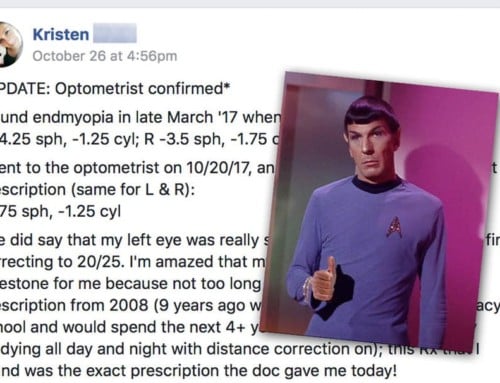
*Completed measuring tool will look like this:
REFERENCES
Astigmatic blur: https://endmyopia.org/astigmatic-cylinder-blur-vs-myopic-spherical-blur/
Astigmatism posts: https://endmyopia.org/correct-astigmatism/
Facebook astigmatism tool discussion & credits: https://www.facebook.com/groups/560893680770705/permalink/570305979829475/
So that’s the first way of measuring astigmatism.
You can accomplish the same thing without a printer, as long as you have a measuring tape, piece of paper, and a pen.
Let’s take a look:
2 Astigmatism (Without Tools)
*The following is courtesy of Ian, posting this thread in our Facebook group.
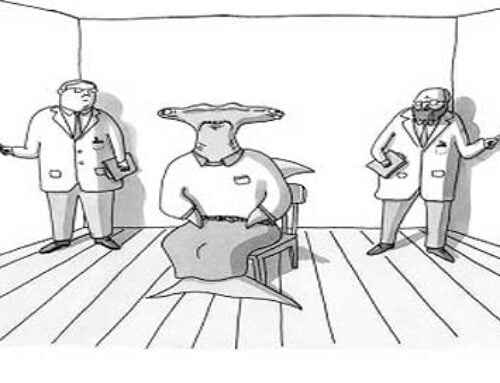
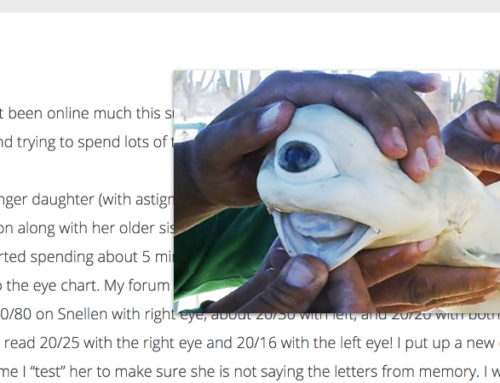
If you have astigmatism here is a good way to measure it. On a piece of white paper draw two lines about 5 cm long and around 2 mm thick at right angles to each other. Take off your glasses and in a well lit room place the paper where the lines are both slightly out of focus. Now rotate the paper and you should notice one of the lines will come into sharp focus and the other one will become more blurry – that is your astigmatic axis. Now fix the paper on the wall or on a convenient tabletop in that position. Label the in focus line as B and the blurry line A. Go and grab your measuring tape.
Now move close to the chart such that both lines are in focus. Now move away so that A is just a tiny bit out of focus – record the cm as reading 1.
Now move further away such that A blurs but is just at the point where it is still resolvable as a single line and not doubled. B should be a slight bit blurred at this stage – record the cm as reading 2.
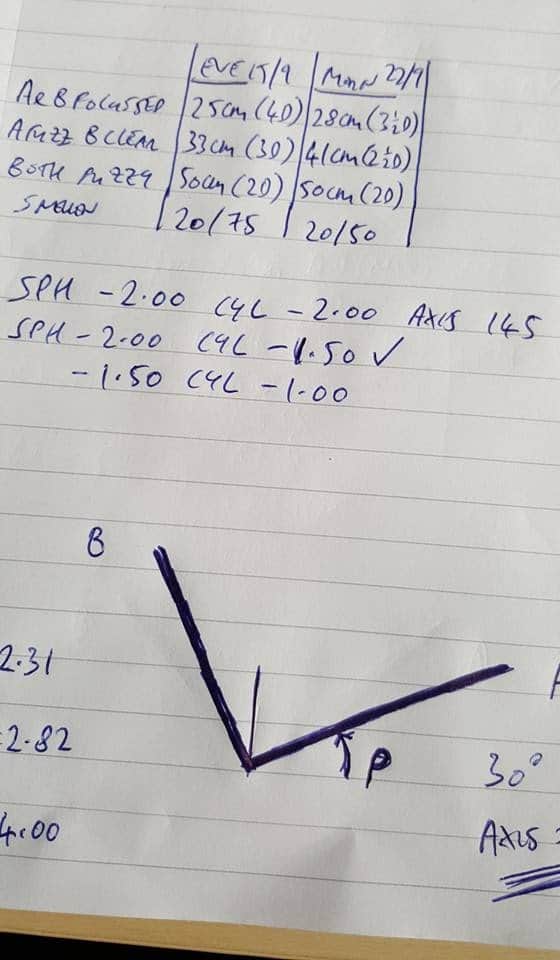
Convert the readings into diopters as follows, for example my readings earlier today are;
reading 1 = 28 cm 1/0.28 = 3.50 D
reading 2 = 50 cm 1/0.50 = 2.00 D
sph = reading 2 (-2.00 D)
cyl = reading 1 – reading 2 = -1.50 D
Your axis you can calculate from 180 – p where p is the angle measured from the horizontal to line A. In my case p = 30 degrees therefore my axis is 150 which is pretty close to the opticians value of 145.
Here is a photo of my chart – lots of notes scribbled as i was working out how to measure everything. Last week i was at cyl -2.00 this week cyl is -1.50 sph about the same which is not surprising as i am wearing -2.00 glasses. Notice the improvement in the snellen chart (with glasses) as my astigmatism falls.
Note that these tools exist because of the contribution of our excellent community of crafty myopes. Give them a thumbs up, contribute to the conversation, share your own DIY tools, improvement reports, and help newbies get on track with their own vision improvement goals.
Have fun with all of this, drop me a line and share your experiences.
Other ingenious DIY tools: the centimeter measuring add-on (read all about it at the link).

Band of myopia dissident geniuses!
Add this to our excellent printable eye charts and our equally excellent centimeter diopter measuring tape in A4 size as well as letter size.
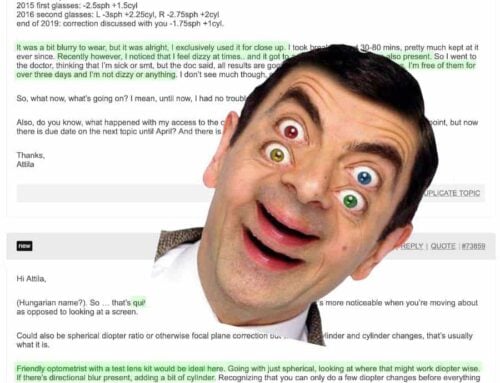
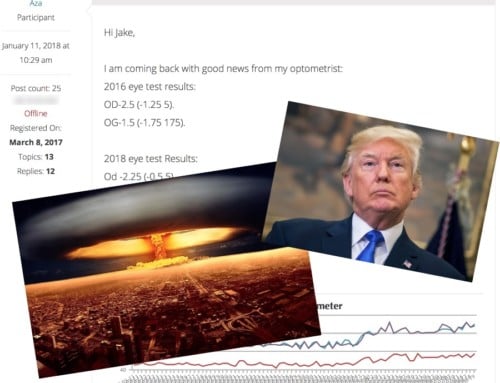
Latest update, reader Ron built a combo device that measures both astigmatism and spherical myopia for him at home. It’s an easy DIY project:
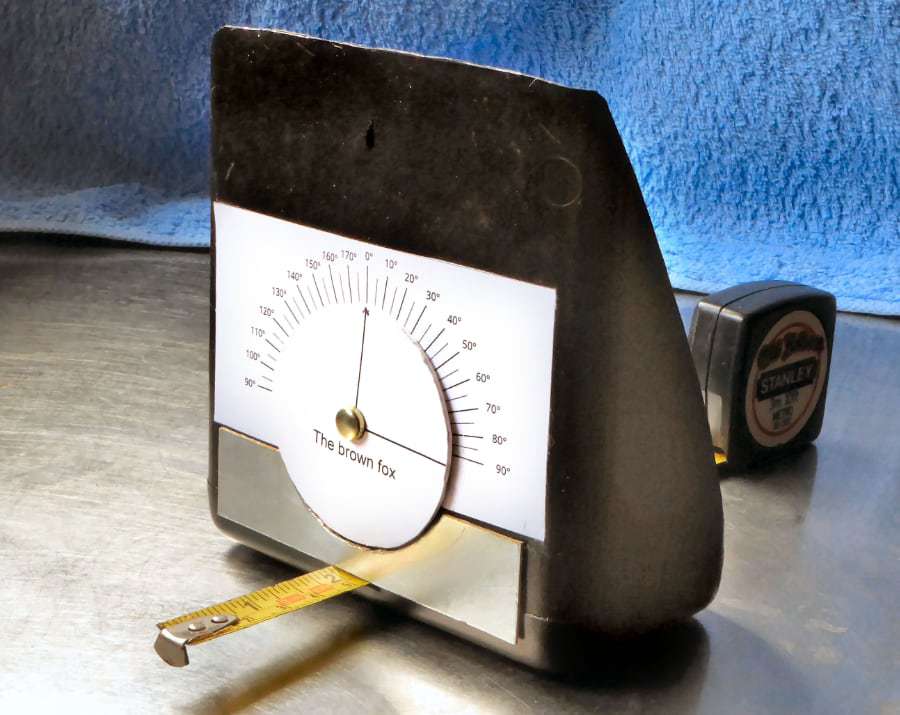
Pic above, a combo device that measures both distance to blur (focusing on the central letter “o” under the pivot pin is all that is needed) as well as astigmatism. The dial is glued to a thin sheet of flat plastic cut from the lid of a food container.
And there we go. Keep making those 20/20 gains!
Cheers,
-Jake